Showing posts with label Horse and Musket. Show all posts

Friday, 25 May 2012

First '45s

A while ago I bought some Roundway models from Navwar, specifically English and Jacobite troops for the rising of '45. Other projects done, I've moved onto them, and I just finished my first nineteen models: two groups of 8 and three Big Men for Sharp Practice.


They have a cheerful, old-fashioned appeal, and I painted them in the colours of the imaginary King's Own Royal Borderers regiment, yellow trim and blue sashes. Two sergeants and an officer make up the Big Man quota. Me? Classist? Never! The one with the halberd will be the original Gideon Frost, beginner of the Frost Saga (my Blackadders of fake military history). Once I get some highlanders painted up, there will be more Sharp Practice battle reports on here but until then - enjoy your weekend.

Thursday, 10 May 2012

The Battle of Laufenburg

I had a very late game of Volley and Bayonet last night, and given its 10pm-1am nature, no pictures were taken as the Duke of Cumberland and his German allies protected the road to Hanover from the advance elements of la Grande Armée.

It was a 3500 point game on a 4x4 board, which looked like this:
The Laufenfluss river crossing the board there.
The Allies were defending their lines of communication at the south of the board from the French, who attacked from around the Grauberg hill in the distance.

It was a close game until a routing Dragoon unit dissipated the French left, routing them off the board edge they were hugging. Overall, it was full of magnificent Napoleonic imagery. 

In the east, at Laufenburg, the Ruritanian Berhauß Division was quickly cleared out at bayonet-point, except for the Grenz, who lost the castle to the French assault but kept the heights despite all attacks on their position. The King of Ruritania himself led his cavalry in two counter-attacks to avenge his broken division, the first of which was bloodily repulsed by the 26th Ligne, but the second of which broke the back of the French Dragoon division and routed the entire flank.

At the bridges of Lopkopf in the centre, the 2nd Guards brigade faced down a division of the Imperial Guard, pouring such a weight of fire across the bridges that they were burnt and broken in their toils.

In the west by Tauchen Hill, the 95th Rifles (I know, they didn't exist yet) sold their lives dearly in the village below, slowing Du Vallon's division long enough for the Brunswickers and British 2nd and 3rd Divisions to make a line of iron across the valley and the ajoining Hugel Heights that an entire corps of the French threw themselves in vain. By the close of the battle at around four in the afternoon, around 10,000 Frenchmen had died in between Tauchen and Hugel, for the loss of maybe 1500 Allies. Behind them, the Brunswick Hussars had slaughtered their way through the brittle Provincial division.

Even in the moment of the Allied triumph, the French showed their quality as a titanic cavalry battle took place on the south bank of the Laufenfluss and the British Heavy Brigades were scattered. But it was too little too late, and Maréchal Mouranne had to retreat to explain his failure to the Ogre himself...

Man of the Match: Variously the British 2nd Guards Brigade who held up the French centre by themselves, or the Ruritanian Liebgard cavalry who by lucky circumstance routed a flank by themselves. Either way, by the end of play the game was solidly the Allies'. I really need to paint up a few more divisions so that a couple of failed assaults no longer mean game over for a significant portion of the army.

Friday, 16 March 2012

Candle's Bluff, 1862

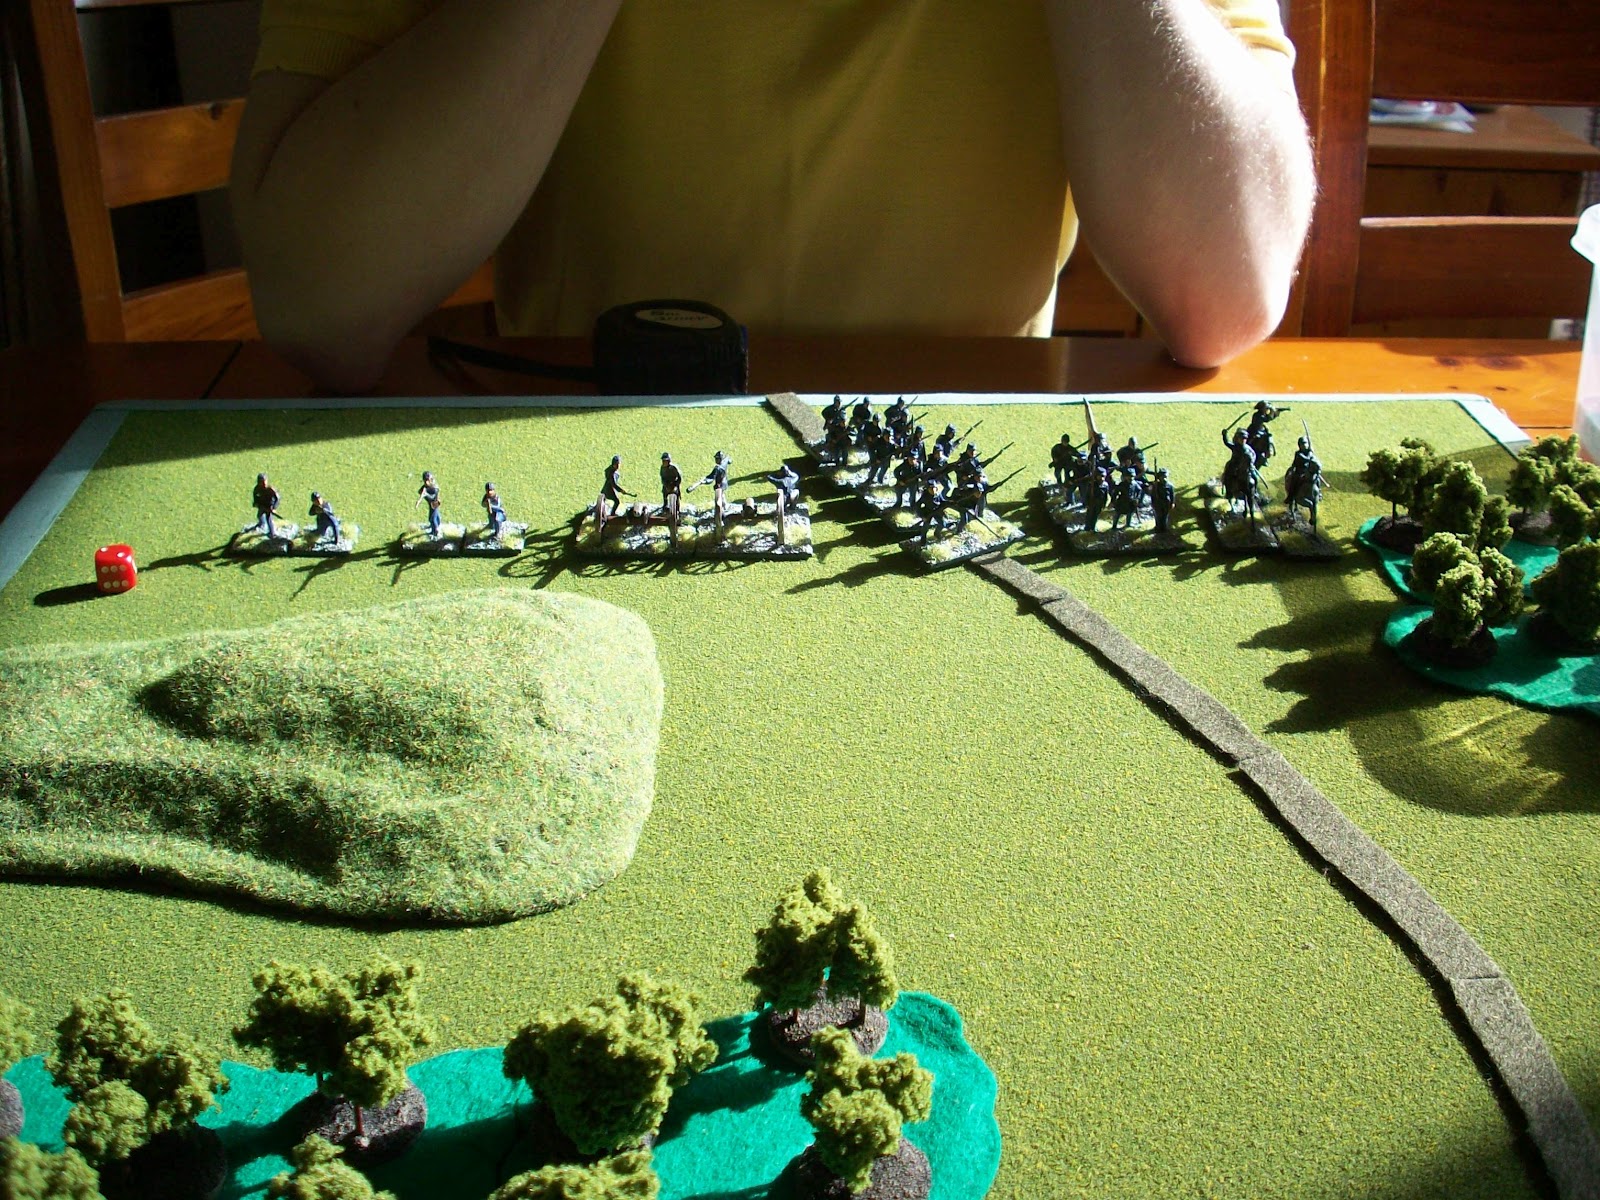
As the War Between the States intensifies, both sides decide to seize the hill known to the locals as Candle's Bluff. Unfortunately, as brothers are wont to do, they come to the same conclusion simultaneously - and battle is inevitable.

The battle was fought using the Humberside Extension for DBA, both sides (accidentally!) coming out to:
General; 1 Cannon; 1 Cavalry; 3 Rifles; 2 Jaegers; 5 Muskets. And then, due to a mysterious accident of arithmetic, the Union got an extra piece of cannon.

The Battlefield in all its felty glory.
The Union advance before the might of Barbarossa's elbows.

Unfazed by Barbarossa's giant hands, the Confederates move up too.
Both sides advance towards the hill and up the road.

Confederate sharpshooters crest Candle's Bluff.

Bloody fire is exchanged as the Union press forwards.

A bold charge by the Union cavalry is repulsed by cannon fire.

...and ended by muskets. 0-1
More boys in blue die on Candle's Bluff. 0-2

Union rifles rout the Confederate right wing. 1-2

The return fire is just as deadly. 1-3

Union skirmishers exact revenge on Candle's Bluff. 2-3

Union volunteers wither and flee under the weight of Southern fire. 2-4

Bloodied but unbowed, the Union finally take Candle's Bluff. 3-4

Cannon and skirmishers together rout the southern horse in the woods. 4-4

A Confederate battalion breaks under grapeshot from close cannon. 5-4

So many have died that there aren't enough death tokens... 5-5

Skirmishers fall as the southern battleline turns. 5-6

The straw that breaks the Union's back. 5-7 CSA win!

From Hell's Heart New York stabs at thee! Final score 6-7.
This was a fun, tight game between me and Barbarossa, who was playing DBx for the first time. A staunch GW player, he was astonished at the fun possible with just one die each - and to be honest, it was even more fun than I thought it would be too. I guess he's just a great opponent.

We swapped sides and had a rematch too, which ended 6-8 to the Union. Again, the bluff itself was key to the way the battle ended as the brigaded Union Rifles stormed the hill and massacred the opposing skirmishers and cavalry with heavy fire - and a good thing too, as Barbarossa's Confederates dominated the plains and slaughtered my jaegers in the woods.

Men of the Match: Rifles, on both sides. This truly was a chance for them to show their quality, and they did, outmatching every unit on the table in both killing and staying power.

Sunday, 29 January 2012

Outpost: Slaughter

EDIT: Mistakes fixed in the Outpost: Slaughter scenario file.

More of a modelling than a gaming week this - nearly 80 Mujahideen are an inch from finished, and a platoon of modern British are primed. Three more 15mm buildings are nearly done, and some scifi lamposts and Hotspots are practically done too.

We had a game of Volley and Bayonet last Sunday, an ersatz version of Dennewitz at 4,000 points a side. It was essentially a giant bloody shoving match in the middle of the board. The French lost about 2,500 men, and the Allies (British and German) lost about 8,000. The French were on the back hoof until Turn Five, when they triumphed massively across the whole line, routing whole brigades at every turn. Brigade of the Match goes to the Highland Brigade, who were flank charged by French Cuirassiers and sent them packing.

While no photos were taken of the match itself, Archangel's girlfriend took some amazing photos of the set-up (which she helped with!).
British Advance

Aerial view of the Allies

French Advance

Aerial view of the French

Iskander and I also played a game of Force on Force tonight, using this homebrewed scenario, Outpost: Slaughter. The Canadians of Operation Enduring Freedom took arms against an assault on their platoon house by Jebel Hadr's Milice Internale.

For the first time ever, I won against Iskander (though I can't say I beat him), as he drew a staggering ten Fog of War cards against my one, in just four turns! It was a ludicrous display of luck that saw Delta Force snipers and a medic join the Canadian defence, a sandstorm, two sets of blitzed orders from OEF HQ, two house fires (including the Platoon House, which can no longer happen) and the sudden discovery of architectural flaws in the platoon house's defences. It was neck and neck until the QRF arrived and took a HotSpot-ed Dushka's fire in the flank, whereupon Iskander conceded in exchange for cassoulet and cake. All in all a smashing game that highlighted a lot of what I love about Force on Force. Man of the Match goes to the second Dushka team who scored 4 hits against the Hummer's side armour, causing a Catastrophic kill and taking the score from 13-13 to 37-13 to the Milice Internale insurgents.

Initial board set up.

From the other end.

The village of Kowete (left) and the Platoon House (right)

Everything that was on fire at the end of Turn Four.

Saturday, 7 January 2012

The Battle of Holfschader 1806

As French move to attack the German states once more, the Ruritanians and their Brunswicker allies decide to try and defeat them in detail. Having gained intelligence that a French corps is reuniting at the town of Holfschader, they force march to assault the forward elements before the rest arrive.

The plan half worked - the French army was divided when the Germans struck, but only just. As the battle continued, they would receive many more reinforcements.

This was a 1,500 point game of Volley and Bayonet, pitting 4 German divisions against 5 French ones.
The German army was comprised of Ruritanians using the Early Austrian list (linear infantry, massed cavalry) with 2 infantry divisions and one cavalry, and a division of Brunswickers using the Late British Allies list (everything but the Guard skirmishers).
The French (Middle list) had an Elite Infantry Division (Polish Legion), a Guard Division (Grenadiers and chasseurs), a large Dragoon division and two divisions of two infantry regiments.

This was a game with maximum 8 turns, burden of assault on the Germans. Victory conditions were: Exhaust all French Divisions for the Germans, survive with an unexhausted division until turn 8 for the French.

Holfschader, before the armies arrive. Note the castle on the hill where the Poles started, the central town (Holfschader) where the Marechal and his Guards were quartered, and the road behind the orchards at the top from whence the infantry reinforcements came.

Early moves. The Ruritanian cavalry blitzes ahead to flank the town while the infantry are more cautious. The Black Duke hangs back at the riverbank, unwilling to disorder his troops in front of the deadly Polish Legion.
The French infantry march up to support the Marechal, who leaves Holfschader for a commanding position on the heights...

Which is no help as the gallant Ruritanians charge into his Guard, shockingly annihilating the Grenadiers and sending the Chasseurs packing, albeit with gross casualties and SO MANY SIXES.

The French Dragoons arrive, ready to help their countrymen!

The Ruritanian hussars sell their lives dearly, and the Cuirassiers, flush from routing the Guard, destroy the Dragoons who were rash enough to attack them over the hill. One lonely brigade remains...

As the Ruritanian king and his division move to take Holfschader, the Poles and the French surround him. Luckily the old town's buildings are stout and only a few men fall to their withering fire.

Emboldened by the Polish abandonment of Holfsberg, the Brunswickers advance, pounding the Polish right with deadly fire.

The Ruritanian infantry shakes itself into line, free to organise itself now that the French are concentrated on one flank.

The French retreat across the River Weisen, taking firm positions against the advancing (and very lucky) Germans.

The view from the French left.

The view from the French right.

Tired of stalemates and exchanges of fire, the Brunswick Hussars assault the French wing and rout the 32nd regiment of infantry.

The 19th regiment's attempt to avenge their brethren fails, and they retire across the rear of the French lines.

With a daring river crossing in the face of the enemy by the Ruritanian 13th Regiment, massed fire annihilates the French 26th regiment.

The Hussars rout the 39th against the river, and with the Polish hiding the orchard bedeviled by painful Brunswick fire, the game ends - the French sorely defeated.

Butcher's Bill:
German losses 3,000
French losses: 17,500

This game was massively influenced by luck - the early breaking of the Guard, and the performance of the German cavalry in general was in all ways the deciding factor in this game, along with some very shaky die rolling for French morale. But La Republique Ne Mort Jamais! I'm sure we'll see another game soon.

This was a 2mm production for Volley and Bayonet by A-historical gaming =]

Sunday, 10 July 2011

HotT for Teacher!

Well, not really. But I am re-teaching myself Hordes of the Things (not that it's an activity that takes an undue length of time).

With my new Irregular Miniatures 2mm models and some recycled MDF hills (goodbye sweet bookcases, hello sweet terrain), I was just gagging to get my game on and so...

A board where the only thing finished was the river! And even that wants flocking...  The black squares at the river's edge count as BUA, and the river between them as clear crossing.

I've been reading Phil Barker's beta ruleset Horse, Foot and Guns recently, and while enjoyable (at least in its earlier incarnations), wasn't what I was looking for in a quick game. So HotT it was, using Mr Barker's recommendation that base-to-base contact include close shooting as well as close combat. So line infantry became Spears, guards became Blades, bayonet-happy infantry turned into Warband, shooters cover only sharpshooters like jaegers, chasseurs and rifles and the rest is standard.

The armies were:
Albion (Left)
Blade General, 2 Blades, Knights, 2 Riders, 4 Spears, 2 Shooters. The Blades were brigaded together in the centre, with brigades of 2 Spears and 1 Shooter to either flank. The Riders were on the southern wing, and the Knights to the north.

Franconia (Right)
Hero General, Knights, 3 Riders, 2 Blades, 2 Spears, 2 Warbands. The Spears and 1 Blades took the northern flank, with the Warbands and another Blades in the centre. The riders covered the southern approaches, and the Knights and the Hero general stayed back as a reserve.

The game started with a whopping 6 PIPs for the Brit... err... Albionese? Albiards. Their northern infantry seized the town at the crossing, and their riders took up position on the southern hill in the riverine peninsula. Other infantry moved to secure the river.

The Francs, confident in their superior numbers, moved forwards. Their irrepressible cavalry charged the Albiards opposite them, but managed only a bloody draw, despite their advantage in numbers. In the next bound, the British completely destroyed them before crossing the river to threaten the Franc general. He called their bluff and routed one unit, sending the other cowering back to the island it had previously defended successfully.

As all this went on, the Franc infantry moved to assault the river. For several bounds, there was little motion (even when Albiard Blades attacked Spears while Knights flanked them!), until in one turn, three Albiard stands were destroyed. Things looked to be evening up until the British got another 6 on the PIP dice and manoeuvred into a crushing FIVE UNITS destroyed in a single bound. Game over.


This was the state of play at the end of the last bound. The Albiards still hold their side of the river - and have a unit of Riders in the south facing off against the ineffectual Franc Knights. The Francs have been reduced to their Knights (bottom right), their Hero General (below the BUA right), and one stand of Blades (in the river).

All in all, a fun, tense but thorough victory for Albion. Hopefully to be repeated soon in Technicolor. From the initial drybrushing of the Franc units, that shouldn't take too long.