Showing posts with label 18th Century. Show all posts

Wednesday, 10 August 2016

Battle of Benjamin Bridge


With its release just a cover design away, I decided to play a game of Tree of Liberty with a friend after our Sunday lunch last week. The game is specifically designed for the mid-range battles of the American War of Independence, so we quickly threw some terrain on a 4'x4' table and dug out some units

British Order of Battle
General Brassick: Status 2
Brigader Suttle: Status 3
Muttoncuffs, 5 bases: Regulars, muskets, colonel, Cohesion 4
Fusiliers, 6 bases: Regulars, muskets, colonel, Cohesion 5
Canadian Highland Volunteers, 9 bases: Regulars, muskets, colonel, Cohesion 3
Queen's Rangers, 6 bases: Regulars, muskets, Cohesion 3
Hessian Jagers, 4 bases: Regulars, muskets, light infantry, Cohesion 4
Dragoons, 6 bases: Regulars, cavalry, colonel, Cohesion 3

Command Initiative: 4 dice, 9 orders
Breakpoint: 17 bases

American Order of Battle
Brigadier-General Horeson: Status 3
Brigadier Grimley: Status 3
3rd Maryland, 10 bases: Regulars, muskets, colonel, Cohesion 3
1st New Yorkers, 10 bases: Regulars, muskets, colonel, Cohesion 3
9th Connecticut, 10 bases: Regulars, muskets, colonel, Cohesion 4
Riflemen, 12 bases: Irregulars, rifles, Cohesion 3
Benjamin's Hollow Militia, 3 bases: Militia, muskets, Cohesion 2

Command Initiative: 4 dice, 9 orders
Breakpoint: 15 bases

The Game
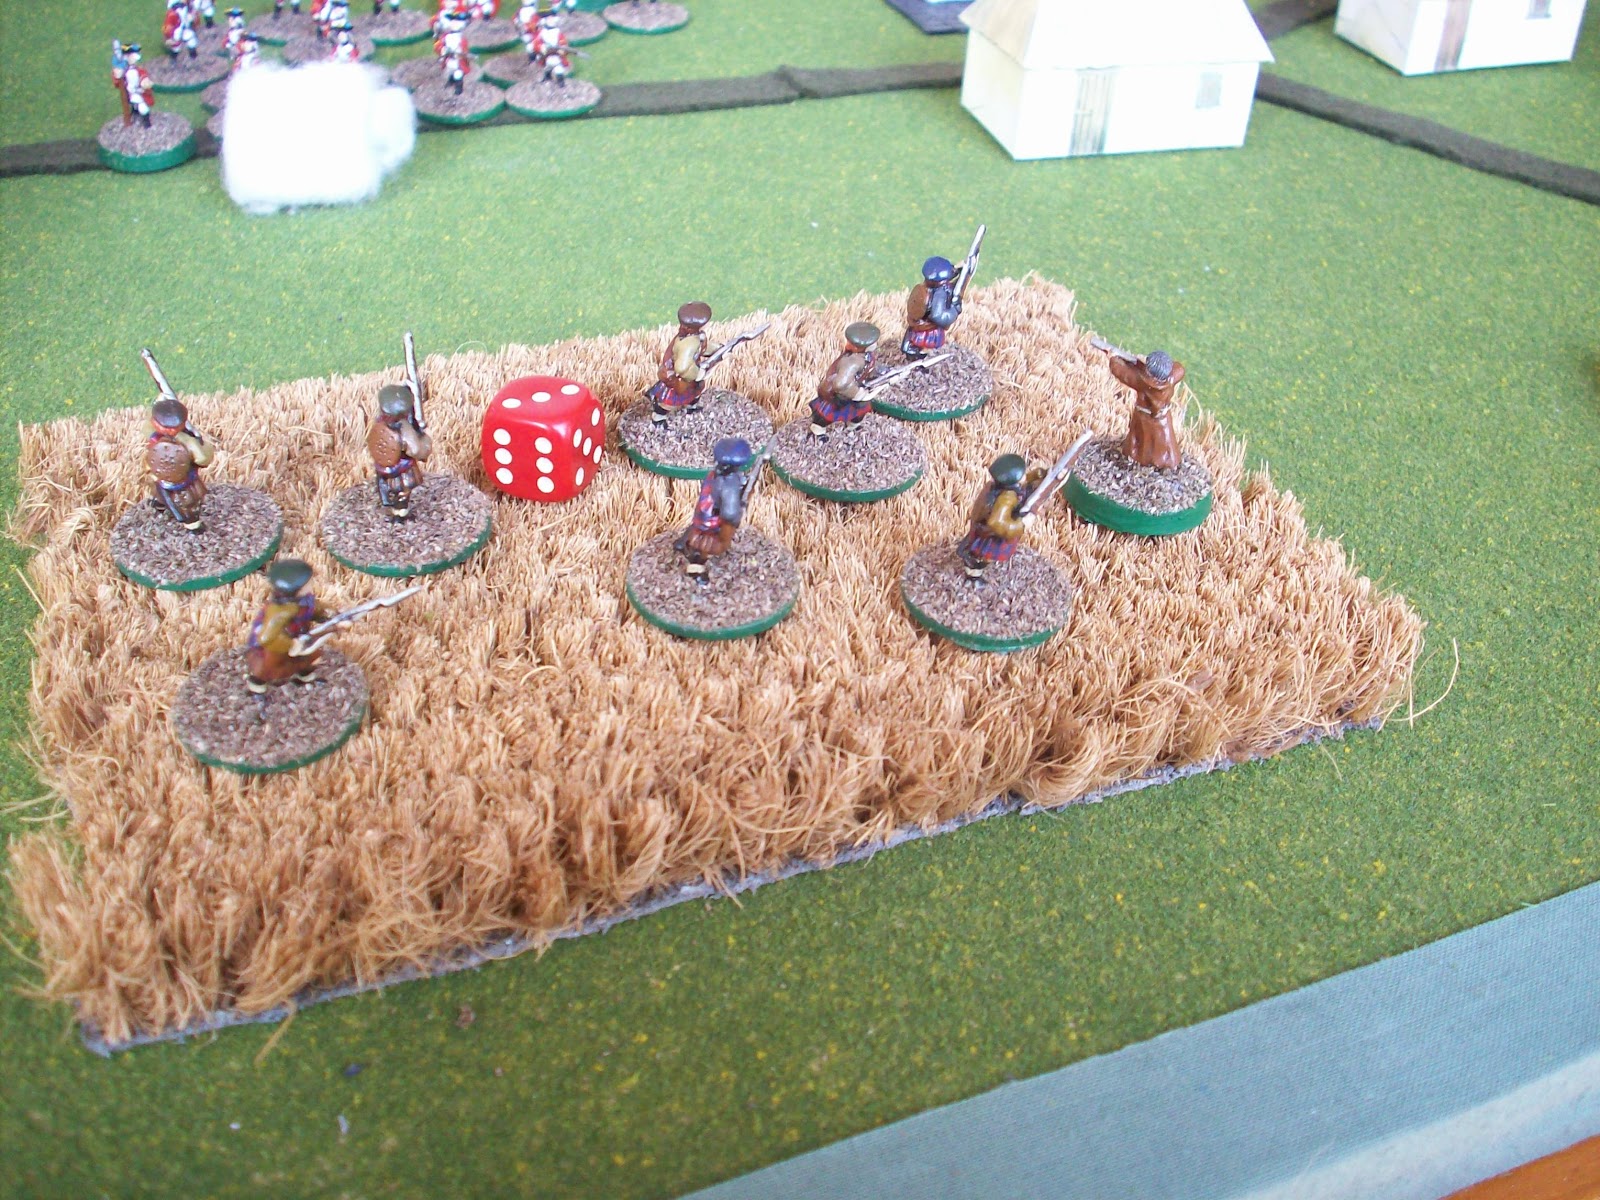
Both armies were divided by the Sackahominy River, only crossable at the rickety Benjamin's Bridge. Defending both sides of the road, the Patriots lined the fences and waited for the British to advance; which they did in short order.

The Canadians were slow enough to ruin any chance of success on their flank. Their reluctance to get to handstrokes meant that despite their stellar success breaking three units of Americans with fire and bayonet, the Muttoncuffs were abandoned in a cauldron of musketry and eventually annihilated in a counter-charge. The Canucks eventually made it almost the whole way to the bridge before being similarly surrounded and shot to pieces. Brigadier Suttle was the only British piece remaining on the left bank of the Sackahominy by the time the game ended.

In part, that was due to General Brassick destroying his army's command and control by sacrificing himself in a successful charge alongside the Fusiliers on the other side of the river. After a few sharp exchanges of fire with the Patriots in the hills and woods opposite, they routed New Yorkers off the road fences, but like the Muttoncuffs were caught without support and squashed flat.

On the British right flank, the skirmishing Rangers and Jagers were quickly bogged down in ineffectual firefights against Connecticut line infantry and swarms of riflemen. By the time the Dragoons moved up in support, any attempt to charge the American lines would have been a waste.

The battered British right withdrew having watched everyone to their left flee the field in poor condition. No Loyalists would be passing by Benjamin's Bridge any time soon...

The Fusiliers exchange fire with continental infantry.

The Muttonchops crest the hill and take a volley.

The lane fills with powdersmoke and bullets.

The rest of the Patriot flank opens fire, ineffectively.

With zeal and bayonets, the Muttoncuffs charge home!

The die roll that sealed the Fusiliers' fate!

The Canadian Highlanders stand firm until the last.

Butcher's Bill
British: Almost 900 casualties; Americans about 600

Man of the Match
The Fusiliers provided two perfect lessons in how to conduct a bayonet charge, both giving and receiving perfect set-piece shock attacks preceded by heavy musketry. For their foreshadowing of Pickett's charge, I name them the Men of the Match.

After-Thoughts
The British were attacking against greater numbers, and trusted too much to their superior quality – which wasn't actually much greater overall, despite the presence of the Fusiliers and Muttoncuffs. Their arrogance met with an almost Hollywood end – riflemen in the woods and Continentals at the fences shooting down men who stayed shoulder-to-shoulder far too much. It is telling, I think, that all the bases lost to shooting were lost from units in Ordered Line, and none from those who took just as much fire but were in Open Order. Good units caught alone were crumpled and I often regretted a lack of second and third lines – it all felt very historically accurate!

Ben enjoyed the game, which since it was his first for years and years was very gratifying. It is interesting that while another playtester called it really fun “micro-management”, Ben said it was “kind of abstract and simplified” but really fun – it just goes to show how different two people can find the same game while still enjoying it! Tree of Liberty should hopefully be available for purchase from the Wargame Vault in the next few weeks as the next installment in the Tactical Two Pager series.

Monday, 25 August 2014

The West Rises Midst Battle's Din


Almost two years on, I reprised my The West Rises campaign on a bank holiday afternoon – this time with my newly released Midst Battle's Din rules instead of Sharp Practice or Muskets & Tomahawks.

Setting the Scene
The crossroad hamlet of Kirk's Cross is a quiet one, but one which hides a secret – hiding in the ruined tower just outside the settlement are a group of Jacobites! But that is no longer a secret. Now the vicious Captain Castagne and his men have come to bring fire and sword to Kirk's Cross in the name of the king, and the villagers will have to decide whether to swear fealty to far-off King George or the hidden Prince Charlie. Of course really, it's no choice at all...

Govt. coming from the bottom, Jacobites hiding & top.

The Hanoverians: 35 men, Inspiration 3
Captain Castagne: Toughness 3, Fight +1, Regular, Inspiration 0, Luck 7, sword & pistol, mounted
Sergeant Frost: Toughness 3, Fight +1, Regular, Inspiration +2, Luck 6, halberd & pistol
Captain Macguire: Toughness 2, Fight +2, Regular, Inspiration +1, Luck 8, sword & pistol
16 British Infantry: Toughness 2, Great Aim, Fight 0, Regular, muskets & bayonets
16 Black Watch: Toughness 2, Good Aim, Fight +1, Regular, muskets & bayonets

Victory Conditions: 4pts for each house burned or Jacobite character killed (max 40pts)

The Jacobites: 46 men, Inspiration 3
Laird Micawber: Toughness 2, Fight +1, Irregular, Inspiration +1, Luck 9, sword & pistol, mounted
Father McCruil: Toughness 2, Fight -1, Irregular, Inspiration +2, Luck 6, musket
The Micawber Twins: Toughness 3, Fight +1, Irregular, Inspiration 0, Luck 7, sword & pistol
26 Highlanders: Toughness 2, Good Aim, Fight +1, Irregular, mix of weapons
16 Jacobite Milita: Toughness 2, Good Aim, Fight 0, Militia, muskets & bayonets

Victory Conditions: 1pt per dead king's man or house unburned (max 41pts).

The Start of the Game
The British set up with a three-pronged approach, coming on from three lanes of the crossroads. Castagne & Frost led the King's Own Royal Borderers in the centre, and Macguire's Black Watch took a flank each.

The Jacobites mostly set up Hidden, except for Laird Micawber, who was leading the militia on from the other board edge. Having won the initiative, they were unwilling to do much with it. One house opened fire on the group led by Macguire, killing a man. Micawber's militia advanced a little, and then the Hanoverians reacted.
Macguire's men receive the first volley of the game.

Macguire rallied his men and led them forward to let off a volley in fine style against the smoke-wreathed house. The Black Watch on the other flank tried and failed to set the first house alight – clearly they had not lit their torches for fear of alerting the highlanders to their arrival. Castagne and his men had clearly had no such qualms, and their target hovel whooshed into flame as they hurled torches through the windows and the holes they beat in its wattle walls. Frost was rather more circumspect, and led his men into the bushes to observe the village in case a reserve was needed.
The first house goes up in flames.

Macguire's men were cruelly served on the second volley from the house – two more men were blown away by heavy homemade musket balls. The village filled with warcries as highlanders and militiamen moved to stop Castagne's arson.

Ignoring the inflammable house for now, the Black Watch charged their recidivist brethren with drawn bayonets. Men screamed and died on both sides, a pyrrhic victory for the government men. The highland survivors were shot down almost to a man by Castagne's firing line, and the last man fled into the hills. Sickened by his men's deaths, Macguire led his group in setting fire to the house with the Jacobites still inside. Shocked, Frost led his men forward to remonstrate with him.
Fighting breaks out in the streets.

One more quick burst of fire came from the house, and then from the door burst a flood of bellowing clansmen, attacking Englishman and Scotsman alike. Any redcoat was to be stained crimson today. Met by a hedge of bayonet points, they were backed back toward the burning building. From behind them, at the call of a Micawber twin, a new pack of highlanders burst out of hiding and fired a volley at Macguire and his men that left him and another Black Watchman dead on the ground. On the other side of the village, two other Watchmen died to Jacobite bullets too.
The end of the beginning, with fire & Disorder markers.

The Midpoint: British Inspiration 2, 8VPs | Jacobite Inspiration 3, 14VPs
Aware of Micawber's militia advancing towards him, Castagne bellowed to his men. Ree-load! Wheeel-right! Aim... Fire! Fully half the Scots before them fell, and the rest thrown into disarray. Frost and his men countercharged the highlanders who had fled the burning building, cutting most of them down. On the other flank, the survivors of the Black Watch shamefully fled the board. Smirking, the Jacobites repositioned themselves, advancing toward the ever-weaker British lines.
Reinforcements in the distance as Jacobites round the house.

Macguire's survivors recovered their nerve and gallantly charged the foe. It did not go well for them. Nor did Frost and his men succeed in their own charges against the kilted men before them. Only Castagne's masterful move-and-fire gave a glimmer of hope to the government men, smashing as it did the Jacobite centre.
The lone survivor of the Black Watch's charge.
Two clansmen beat four soldiers - and kill one!
Firing lines face off in the centre of the village.

Seeing his men fall all around him, Laird Micawber began shuffling to safety on his old nag, abandoning the grey-coated survivor to his fate. Rushing past him in the other direction came Father McCruil and the other men from the tower, desperate to join the fight before it was over. On one flank, a Micawber roused his men to finish off the Black Watch, and on the other flank the other twin directed a volley into Castagne's men that left five dead.

The Endgame: British Inspiration 2, 12VPs | Jacobite Inspiration 3, 24VPs
Desperate to salvage some shred of success from the expedition, Castagne led the ruins of his firing line to burn another house. On the other side of the village, Frost's men kept the highlanders at bay with disciplined fire.
The highlanders circle the survivors warily.

Castagne's punishment was swift. Another Scottish volley rang out, and he fell dying beneath his horse, the last of his men falling around him. His last moments on earth were spent laughing at the burning thatch above him, which says more honest words about his character than he ever would. Highlanders charged home all across the rest of the village, slaying with every stroke. Jacobite victory was at hand.

Seeing a Micawber gesturing his men on, Frost signalled to his two companions and fired with them. They were rewarded with a gout of arterial blood beneath the burning eaves. They quickly moved away, recognising that the battle was lost. Hacking down most of his retinue, the rest of his platoon followed, eager to get away from the mayhem and bloodshed.

The battle was over. Long Live Bonnie Prince Charlie.

Butcher's Bill
25 Hanoverians (4 routed), 23 Jacobites (1 routed).

Victory Conditions
16VPs to the Hanoverians, 28VPs to the Jacobites – Jacobite Victory

Overview
A fun and fast game, exactly what I wanted of an afternoon. The whole thing took about an hour with almost eighty figures starting on the table - not bad for a skirmish game! I meant to take more photos, but I got distracted playing the game...

The scenario was perhaps a little unbalanced – I should have made the highlanders poor shots to stop them standing off and shooting quite so much. Overall though, it seemed to begin with like anyone's game – some damn fine rolls by the Jacobites saw them take an early lead though. Needing to burn the buildings meant that the government men could never quite co-ordinate their killing potential to the same degree.

So Castagne is finally dead. Frost retreats in ignominy, and Father McCruil has something to crow about. I wonder what will happen next in Western Scotland, 1745..?

Midst Battle's Din is available exclusively here.

N.B. The flames stay on the roof because they are just cotton wool on 20mm bases (and therefore light), and the roofs have not been brushed with PVA, so they have a little grip, especially if you manage to get a little friction going between them and the wool.

Friday, 29 June 2012

In The Vale of Tears, 1745

-->
To say that Captain Castagne was unimpressed by Father McCruil's victory at Lochlann's Tower was to compare drizzle to a thunderstorm. He tore up his quarters for two days, and for a week longer he sulked as his sergeants drilled the King's Own Royal Borderers mercilessly, hoping to avoid any repeat performances.

The Captain only brightened up when the Independent Companies under Captain Campbell arrived. With reinforcements to hand, he decided to personally lead an expedition against McCruil – and a certain garrulous peasant had given him just the information he needed...

McCruil and his men were hiding in Caleduin, a small village in the hills. For want of a simpler plan, Castagne decided to catch the rebels in a pincer movement, dividing his forces in an attempt to ensure the enemy's destruction. Would the Scots stay in the village and be surrounded, or would they sally forth to destroy Castagne's expedition piecemeal?

In jealous recognition of his sterling work thus far, Castagne ordered Frost away from his regiment to assist Captain Campbell, keeping Corporal Armstrong to help him with his own unit.
Royalist entries; Jacobites on blinds.

Campbell opened proceedings, moving his column towards the village. Castagne and his firing line were slow to follow – perhaps the captain was reconsidering the wisdom of his piecemeal approach? Eventually, the captain began giving orders, and at a cough from Armstrong, the firing line moved quickly over the open ground towards the village. Their speed was cruelly repaid as a group of Scots appeared from inside one of the houses, running to the wall and opening fire.
Scots appear!

At the sound of gunfire, Campbell – a Flanders veteran – moved his men into line, knowing full well the effect of musketry on a packed column of men. Still without a real target, the Scots marched bravely on, tensely awaiting their own black powder welcome. They swiftly received it, but as they ducked, they realised that these Scots fired no better than their grandmothers.
The lines advance on Caleduin.

Castagne's men returned fire, doing nothing to even upset the defenders. Campbell's independent company had more panache: they advanced to within spitting distance before unloading their muskets at the defenders.
I'm sorry, would you care to repeat that?

The stone wall stopped the greater part of it, but nonetheless the rebels were cowed by the weight of fire that fell upon them. Their return fire did nothing to shake earlier comparisons. Frost restored order to the line and, though unaccustomed to this English sergeant, the Scotsmen did his bidding, reloading their guns in record time.

Much aggrieved by the Jacobite show of defiance, Castagne ordered his men to reload and advance. Once again they moved into the teeth of enemy fire, but the bullets flew wild above their heads. Campbell's men advanced too, firing as they went; they were now almost nose-to-nose with Caleduin's defenders.

Again Castagne slowed down, his vacillation worrying the men almost as much as the chance of being shot. He must have caught wind of this, because all of a sudden he ordered a general advance against the village! The Borderers charged in, but the Scots, fighting with the ferocity of cornered rats, drove them off, killing almost a quarter of those sent in and wounding Castagne himself. Some distance from the walls, he managed to rally his men, and began preparing them for another charge even as Armstrong tended to his wound.
Walls: The great equalisers.

On the other side of the village, Campbell's men were getting the better of their exchange of fire with the defenders. Seeing no better moment, he stormed the walls himself, unaware of his commander's recent failure. The Jacobites again fought bravely, but were no match for their countrymen. Campbell barely avoided being stabbed in the throat, but his opposite number wasn't so lucky – Douglas, the Laird's brave young son, died in the melee. This was all too much for the Jacobites. Already wavering under the disciplined fire of the independent company, the loss of their lord and of the walls sent them into headlong flight, abandoning their friends to whatever fate awaited them.
The redcoats enter Caleduin.

Unfortunately for Campbell's men, there was not even time to breathe before a counter-attack came surging from within the village, flanking his force – and at its head, Father McCruil himself! It was a protracted, bloody fight, but at the end of it, Campbell's few survivors had been forced back, leaving Frost's detachment alone in the village to face the mad priest.
Campbell is forced to retreat.

Relying on the bond made on the march up, Frost pushed his men into order, and gave the command to open fire. By grim luck, and the by the beating Campbell's boys had given them, this was enough to break the spirit of the men threatening him, enough to drive them right off the board.

At this point, the last few Jacobites slunk away, happy to have given Fat George a bloody nose.
The end of play.

Butcher's Bill
Royalists: 11 men, Captain Castagne wounded.
Jacobites: 8 men, Douglas MacDonail killed.

Overview
A fun game, which got tenser than I thought it would. Father McCruil escaped again, the wily little beggar! Captain Castagne won't be happy about that, nor about Captain Campbell's professionalism, which rather showed him up. Despite the Independent Company's superior achievements, both detachments took roughly equal casualties, which certainly won't look good back in Edinburgh.
The Jacobite morale turned out to be very fragile. In future, I shall move all my Big Men off blinds as soon as may be. While the ambush against Campbell's men did well, it robbed me of vital Shock-reducing powers. Ah well, you live and learn.
And while loyal men live, the war continues... Long Live the King!

Wednesday, 30 May 2012

Skirmish at Glencrae, 1745

-->
To the Englishman, vengeance is an idea, a word. Payback, one thing for another, like commerce. Not for us. Vengeance is a living thing. It moves through the generations. It commands. It kills."

The rising has begun. The King Across the Water has returned, and the loyal men of Scotland have taken up arms once more. But in the western highlands, loyalty is not all that sharpens swords. Fifty-three years is a long time, but the clans do not forget. The perfidy of the Campbells and Secretary Dalrymple shall be avenged. And it will begin here, in the hamlet of Glencrae...

Forces
2x 8 Good English soldiers, 2x Big Men (Status 3 & 2: Sergeant Frost and Corporal Armstrong)
3x 8 Regular Highlanders (Aggressive, Intimidating Weapons), 2x Big Men (Status 3, 2: Earl MacDonail and Father McCruil)

Objectives
The soldiers of the King's Own Royal Borderers are on a routine patrol through the hamlet and are expecting nothing more than an old villager or two complaining about the price of flour. Sergeant Frost and Corporal Armstrong must lead half their men off any board edge but their own to gain one victory point. They gain one victory point for each Scottish Big Man killed.

The Highlanders are looking for blood. They gain one victory point for each British group or Big Man destroyed.
The starting board. All Scots on blinds.

The Fight
Clearly eager for a rest and some water after long hours marching through the highlands, Corporal Armstrong and his men broke column to move towards the village. Sergeant Frost was more wary – where were the children, the chickens? He peered suspiciously at the cornfield to his right and made out the merest glimmer of steel among the stalks, but no sound of workmen bantering. An ambush! He quickly shouted his orders, and his men sent a volley into the field before beginning to reload.
Frost's men fire covering Armstrong's advance.
Shouts came from the far end of Glencrae, and from the woods burst a flood of kilted warriors.
Oh okay, eight warriors and a Big Man.
The cornfields fired back, but Frost's men continued to fire and reload with consummate professionalism. Armstrong's group came under heavy fire from the village, and it was all Armstrong could do to keep them steady. Snatches of Latin came from the field – was there a priest helping the enemy?
Why yes, yes there was.
A smattering of fire came from Armstrong and his men as Frost began a slow advance on the cornfield before changing his mind. Grasping the nettle firmly with both hands he led his men in an all-out charge. Yellow wheat was stained red, and a Borderer fell, but the enemy were scythed down mercilessly, and those who did not die fled far and fast.
The survivors and their margin of success.
Armstrong moved his men into the village, firing a volley at their enemy as they went. Frost moved up to flank him and realised that there were yet more highlanders waiting for them in the woods! His warning was ignored however as the old Earl led his men in a valiant charge against Armstrong's redcoats. They were driven out at lochaber-point and reunited with Frost's force to the west of the village.
A brutal melee amid gunsmoke.
The English reformed, firing at the highlanders who pressed on them from both sides. From Glencrae the Earl egged his men on, but having been savaged in the battle with Armstrong's men, they were uneasy about advancing too far. Seeing their confusion and a chance for revenge, Armstrong led his men forwards again, in an attempt to restore his section's honour. It was a stiff and bloody fight, with many falling on both sides until Armstrong used his polearm to strike down the Earl himself, and the highlanders retreated in a fearful confusion, bearing the body of their lord.

With the retreat of the Earl, it was all over bar a running skirmish with the highlanders in the western woods. As the English retreated they exchanged ineffectual fire with the Scotsmen who seemed unwilling to leave the safety of the treeline – it seemed that having been spectators to the battle, they were unwilling to share their kinsmen's fate.
The end of the battle.
Perhaps it was not a battle for the history books, but Frost was proud that he had only lost six men in defeating these bandits. If Captain Castagne agreed, they would return and flush out these ne'er-do-wells, and the highlands would be safe again, their loyalty to the king repaid.

Butcher's Bill
Six Englishmen, nine Highlanders, the Earl wounded, Father McCruil and three companions fled into the wilds.

Conclusion

2-0 to the King's Own Royal Borderers.


I had a book of Heroes and Villains as a child, and the Massacre of Glencoe made a deep and lasting impression on me. Thus, when I started a Sharp Practice campaign for the Rising of '45, I naturally gravitated towards incorporating its memory as the driving force behind the highlanders involved. Having two sympathetic protagonists is something I think is important, and vengeance is so much more relatable as a motive than a king without a throne (except for Aragorn, of course). Incidentally, the starting quote is marginally adapted from an episode of Buffy the Vampire Slayer that I serendipitously watched while writing the scenario (2x14, Innocence).

Frost was lucky to succeed in his Spotting check the first time his card came up, and in the profusion of Sharp Practice cards that came his way. Father McCruil spent most of his time removing shock from his group, since Frost's men fired with devastating accuracy. I gave the Englishmen a Grasp The Nettle card each, to help cope with their outnumbered status, but Tiffin usually removed any chance of using it – the turns were incredibly short for most of the game as there were only nine cards in the deck, which rapidly dropped to six.

All in all, a fun game which could have gone either way a few times, especially had the third group of highlanders managed to inveigle themselves into the main battle without Big Man assistance. But for now, Cry God, for Gideon, England and King George. Because Gideon was definitely Man of the Match... or maybe Armstrong, who despite losing more troops, did cut down the Earl...