Thursday 8 November 2012

Muskets and Lochabers, 1745

-->
I've been steadily working through my backlog of models and terrain over the last few weeks, and I'm not buying any more models until the New Year sales. To get around this, and to celebrate the successful conclusion of my first month in the new job, I bought Studio Tomahawk's Muskets and Tomahawks – and very nice it is too. Of course, having played it at the White Hart a few months ago, I already knew that.

Not having any French or Indians to fight the French & Indian Wars with, I decided to trial the rules with my Rising of '45 models. I totted up the points for the English and the Jacobites, rolled to determine the scenario and side-plots, and set to - the English outnumbered 3:4. For those with a copy of the rulebook, Castagne's side-plot was Madness, and MacDonail and McCruil had Emotive and Truce respectively. In a lovely bit of narrative irony, Frost and Dunmore rolled Friendship and A Hateful Heart.

Angered by his perceived humiliation at the hands of the gallant Captain Campbell at Caleduin, Castagne has decided to burn this hamlet to the ground himself. The rage that has burnt in him since Lochlann's Tower is starting to take its mental toll, so his underlings watch him very carefully. Sergeant Frost is particularly paranoid of his superior's attentions due to the admiration he harbours towards the tough old laird they hunt. In grim difference, Lieutenant Dunmore of the independent companies is simply determined to prove his loyalty to King George in the blood of his fellow Scots.

Recovered from his sickbed, the Laird MacDonail has risen to avenge his firstborn's death at Caleduin. Now irrevocably allied to Father McCruil's cause, he looks to kill the fat king's slaves, though he is loathe to bleed his clan any further. Little does he know that Father McCruil has received secret orders from King James to trick the English into thinking that the Westermen are loathe to fight...


The Game
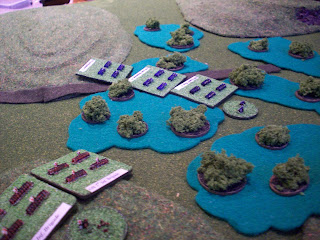
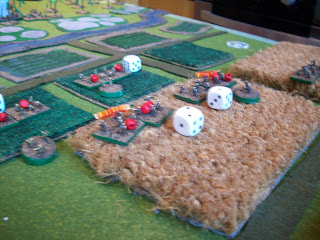
Opening positions.

As the action opened, Father McCruil ordered the highlanders on the Jacobite right forward through the woods. They moved quickly between the trees, planning to take up firing positions in the treeline. Only after the lowlanders under the Laird's direct control swept into the fallow fields did the Royalist infantry notice the enemy's advance.

Mindful of their comrades' example at Caleduin, the independent companies on the Hanoverian left moved forward through the cornfields. The King's Own Royal Borderers, wary in Castagne's presence, marched through the muddy fields, eyeing up the lowland militia opposing them. As the highlanders edged on toward the hamlet, crowding the edges of the woodland, the central group of company men seized the closest building and set about smashing out windows and wattle for firing ports.
A card into Turn Two.

Unwilling to waste his men's powder at long range for the chancy virtues of firing first, Castagne whipped his men on towards the increasingly uncertain-looking lowlanders. Luckily for the Borderers, their advance to the hedges was unimpeded by treacherous fire, and their first volley tore a bloody hole in the enemy centre. One flank fell back and the other fled back toward the hedge they had just merrily climbed.
The KORB's fire pushes back the survivors.

Realising that they could do no good from inside the house, the independents set the place ablaze and fell back. On the other flank, the bloodthirsty Dunmore led a second group of his men in a gallant charge against the closest highlanders. Though Dunmore's adversary thwarted his charge, his men did sterling service and pushed the enemy back for a small loss.
Dunmore takes the woods' edge...
But the highlanders push back!

Dunmore's men resisted the first rush, but numbers began to tell. In a steel flash, Dunmore was alone among the trees. With a quick one-two he was past his opponent's defence, the long-haired rebel dead at his feet, but as he crowed another man stepped up with his pistol and fired a crooked ball through his eye, leaving him slumped over his success like a bloody doll.

Furious at the cruel vandalism shown by the independent companies, the rest of McCruil's highlanders were flooding around the burning building to exact revenge. This show of Scottish spirit seemed to rally the Laird's men, and though the initial effect of their fire was negligible, the number of balls flying began to tell on the Borderers they faced.

It was as well they did not see the rest; dragged into open ground by their rage, the leading highlanders found themselves in a deadly crossfire between the fields and the house burners, losing half their number in one swift volley. The second cast the survivors down like scarecrows in the storm.

The next group launched themselves over their comrades' corpses, hacking at the independents with that passion reserved wholly for traitors and home-burners. But fury is no aid when skill is needed, and the independents held, starting a swirling melee beneath the roaring flames.
Scotsman versus Scotsman.

Not only did the independents hold, but they avenged themselves wholly of Lieutenant Dunmore's death, cutting down all but the weakest highlander, who fled in terror before death's reach.
Start of turn three.

A small party of independent company men began stalking the woods for any trace of surviving enemy, and Father McCruil fled before them. The rest rushed to burn the second house, leaving their muskets unloaded in their haste.

On the other side of the hedges, the Borderers maintained the upper hand, delivering relentless volleys that smashed Scotsmen and Scots discipline apart like so many glass baubles. Despairing of this exchange of fire, the Laird's men charged the hedges, hoping to sell their lives more dearly than those who now lay broken on the farrowed earth.

The men in grey leapt onto the Borderers, fighting like men possessed. Though outnumbered, they fought on grimly, until their dead and the Borderers' surrounded a single redclad survivor. Their fellows in tan caused fewer casualties, but managed to drive the redcoats away from the hedgeline with their eerie highland chants. Once over, they fired a single hurried volley and charged again, but this time their bravery ended more ignominiously.

Only Father McCruil and the old Laird now remained hale in King James' service, and as the second homestead went up in flames they beat hasty and separate retreats to consider what their next moves against the German pretender should be.


Butcher's Bill
Jacobite: 24 Highlanders, 16 Lowland Infantry
Hanoverians: 12 Borderers, 6 Independent Company men, Lieutenant Dunmore


Victory Conditions
Hanoverian: Destroy all buildings      Success
Lt. Dunmore: Kill 6 enemy/3 in melee Failure
Sgt. Frost: MacDonail survives           Success
Cpt. Castagne: Keep on living crazy   Success

Jacobite: Kill 2/3rds of the enemy       Success
MacDonail: Don't play the Morale card Failure
McCruil: Enemy shoots/melees first   Success

Overall Victory: DRAW!!!


Overview
That was tremendous fun, and shows you really can get an inspirational bit of skirmish on a 2x2. Dunmore's desperate failure in his sideplot – the eight rounds of combat fought in a single determined turn by the greycoats – the village being burnt by the Scots in the Hanoverian contingent... The whole game seemed very evocative of the period.

Apart from Dunmore, none of the officers really got involved, due to their only having activation each turn... unless I misread? I let Dunmore move because he was part of a unit, but I tried to keep Frost and Castagne back a bit, and boy did that teach me to be careful what I wished for! The same thing happened with McCruil and the Laird, though I'm glad the old fox survived.
EDIT: I now know I did misread, so thanks to all those who told me so.

Man of the Match goes to the lone greyclad lowlander who fought half the above fight himself, and personally killed three of the seven casualties his unit caused!


N.B. At the time of the '45, the lochaber had been relegated to the constabulary, and was considered the police baton of the day. Thank goodness things have calmed down a bit since then!

Friday 26 October 2012

Battle of Cuestas del San, 1810

-->
Portugal. 27th September, 1810. On the crests of the Cuestas del San, a British army under General Victorian Mourne awaits an assault by Général Mathieu of the French army. 26,000 of Wellesley's finest stand firm ahead of an attack by 43,500 men of Napoleon's Grand Armée.

The view from the British lines.

This was Napoleon's first great strike against Portugal since the fall of Ciudad Rodrigo weeks earlier. The Light Division that now held the centre of the British line had done sterling service blunting the imperial sword, but had been forced to retreat. Now reinforced by Macmahon's Scots, Barrington's infantry and 7,000 cavalry, they looked to snap that sword across their knee. 

At ten o'clock, the French began to move.Their line quickly became disordered in the rough terrain of the Iberian hills, and Mathieu took up a position in the church of San Léon on the central crest to better observe his men.

Start of Turn Two.

The French columns snaked across the dusty ground toward the thin red line. De Castelmore's division shook itself into line and squared up to Macmahon's men, while Lebowiecki's Polish Legion advanced to confront the Light Division with D'Herblay's men in support. On the French right, Du Vallon's division approached Barrington's positions on the heights, shuddering before the great concentration of artillery on the British left.

On the other flank, De La Fere's men vanish into the woods.

They were right to shudder. As they approached the hills, the forward lines of the 15th Régiment de Ligne were cast down with thunder and great noise. The Light Division threw out its skirmishers as the French approached, and they wreaked red ruin among D'Herblay's forward units and de Castelmore's flank.

But La Grande Armée could not so easily be denied. Columns charged home against the Scots and Barrington's men on the heights. In the centre, the presence of Mourne's 7,000 cavalry required more caution, and so the Poles and D'Herblay's division merely edged closer to engage the Light Division in ineffectual musketry, shooing the skirmishers back among their parent ranks. Virant, the cavalry corps commander, came up to San Léon as the Polish artillery unlimbered on the hilltop.

So the true killing began. Du Vallon's men tore themselves to shreds on the hillside, giving ground before Barrington's implacable defence. On the other flank, the British 1st Brigade and French 26th Régiment de Ligne fought each other to extinction as the rest of the battered Scots Division desperately threw back the assault.

Already unnerved by D'Herblay's hasty retreat from the Scots position, the Polish Legion were ill-served by a torrent of fire from the Light Division, great holes rent in their yellow-breasted ranks by faithful Brown Bess and her sisters.

As the lines separated in some disorder, Mourne ordered the greatest part of his cavalry forward, to harry holes in the French divisions. On one flank, the Light Brigades slaughtered Du Vallon's 23rd Régiment, sapping the spirits of his whole division. On the other, the British dragoons massacred the 50th in the low valley to the south of San Léon. On both wings, the impetuous British cavalry carried on forward, crashing into Marant's dragoons and the remnants of Du Vallon's division. The 19th de Ligne immediately fled before this wave of horseflesh, leaving their comrades in the 15th Legère to be cut down like dogs by their heavy sabres.

In the valley of San Léon, Marant's right wing fell back before the British, but the Guards brigade were slaughtered in their turn by his steadier regiments.

Turn Four.

The bells of San Léon tolled two of the clock, and General Mathieu assessed his position. Du Vallon's men had evaporated on his left, and de Castelmore's had been almost as sorely used, with only a battalion of the 39th remaining steady around their colours at the foot of the hill. Lebowiecki's Poles and D'Herblay's men were all that remained of his main line, though Castagne's cuirassiers and Marant's dragoons were raring to go. And where had De La Fere got to with his 2,500 men?

A sudden shout of “Vive La France!” alerted him, as De La Fere's division charged from the woods into Macmahon's flank. At the same time, his cavalry leapt forward to punish the British impetuosity, and with a heavy heart, he committed his centre against Montjoy's Light Division.

Heavies rumble toward the lights.

Disordered by their headlong rush, the Lights were easy prey for Castagne's cuirassiers, but against all odds, the dragoons of the King's German Legion managed to fend off Marant's dragoons, sending them flying in disarray.

There was little joy from De La Fere's surprise attack either, as the 2nd Brigade sent them packing, back into the woods from whence they sprang and mauling the 17th.
De La Fere's kills (6s) compared to the 2nd's.

Even the glorious charge of the Polish Legion could not lift Mathieu's clouded brow. Though they destroyed Montjoy's right wing, the division as a whole was worn to a nub, and D'Herblay's was in no better shape. As Mathieu surveyed the field and saw only De La Fere and Castagne's divisions in fighting shape, he knew it was time to withdraw and save what part of his command he could. By five o'clock, the plain was empty of life once more.

End of play.

N.B. Given the loss of half his cavalry, and that his orders were to hold the heights, Mourne allowed Mathieu to do so in relatively good order, only picking off the remnants of the 39th and spiking the Polish guns. For this dereliction of imagination, he was removed from command and sent to Lisbon.

Butcher's Bill:
French: 12,000 dead, 9,000 wounded.
British: 4,500 dead, 5,000 wounded.

Overview
A fun little game that certainly avenged the Light Division's retreat at the Coa! I thought Mathieu had a good chance with about 150% of the British points, but the die rolls were just too good – sixes clearly grow well in sunny soil. It could have swung a number of times – the KGL and 2nd Infantry's stunning reversals of circumstance come to mind, as does Barrington's bloody defence of the British left.

All told – I fancy it's time for more French to get painted!

Thursday 25 October 2012

Battle of Burwood, 1461

-->
Having finished painting my first Wars of the Roses miniatures, I decided to test them out with a game of DBR, since I wanted to get my head around it before deciding whether I wanted to use it for the English Civil War. Yes that's right - I'm all about the shiny new Anglo-centric projects!

The Yorkists came to the field with 10 Bows(S) and 6 Blades(S) – there were many men of quality in their ranks. They were outnumbered slightly by the Lancastrians, who marched forth with 10 Bows(S), 3 Blades(S) and 4 Blades (O). In total the armies mustered 1,600 and 1,700 men apiece.

As the day opened, the Yorkist commander Sir Henry Mourne had put the greater part of his archers on Burrett's Hill. The rest of his men he kept in one great battle, their flanks secured by the village of Burwood and by their fellows on Burrett's Hill.

His opposite number, Sir Alan Reed, had drawn up his men in a smaller line to the south of the great field – little did Mourne realise that the cunning Reed had also placed a column on his northern flank...

Starting positions.
Yorkist line.
Main Lancastrian battle.

Aware of how far his longbowmen could fire and eager to bleed the enemy, Sir Henry moved his men forward, still anchoring them on Burwood. The Lancastrians heaved themselves forward in response, trudging through the spring mud. Excited by the prospect of combat, the archers under Okeham on the hill leapt forward as one and opened fire, disordering the enemy left.

The battle lines continued to close until, horror! Okeham's archers were caught by a storm of arrows from the Lancastrian left and the front rank melted away leaving the rest in disarray. At the same time, scores of men-at-arms in blue and white were whittled down, giving heart to the Yorkists once again. Then on the other flank, the Lancastrians lost archers too. The Good Lord was hedging his bets today.

The battle lines close - but there are more Lancs in the distance!

It was at this point that Sir Henry led his men at arms in a gallant charge against the enemy centre – but his archers hung back, having realised the threat of the Lancastrian second column. The enemy centre was shattered, hundreds of archers falling and the enemy's men at arms thrown back.

The centre cannot hold!

Shaken by this turn of events, Sir Alan could think to do nothing but throw himself back into the fray, but he was beaten back by deWolf's shields.

The last of Okeham's men on Burrett hill continued to drive back the Lancastrian left with their bodkin heads as Sir Henry kept up his relentless, remorseless assault on the Lancastrian centre. Now he and Sir Alan met in the melee, and there he dealt the foeman a great blow to the head that left his shield red with more than paint.

There we called the game, since Sir Alan was dead along with almost enough stands lost to automatically lose. Victory to York!

After the battle, Sir Henry was well pleased, especially with Jack Bone who commanded the archers of the Yorkist left – he had successfully held at bay almost three times his own numbers to give his captain time to break the enemy centre!

The main action at the end of play.

Butcher's Bill
York: 75 dead, 124 wounded
Lancaster: 450 dead, 258 wounded

Overview
That seemed to work about right, but it didn't seem as fun as DBA/HOTT for some reason. I haven't given up hope, but I think I'll have to be much more familiar with the combat resolution tables before I can really enjoy a game of this.

It still gave some fun moments, like Jack Bone's desperate defence of the Yorkist left, or Sir Alan throwing only 1s for his PIPs in the confusion of the melee. He shouldn't have tried to be clever with his deployment - more men in the main battle might well have saved him.

Overall, the game seems a little brittle and sterile, but I think that's more to do with Phil Barker's writing style – I know I don't feel that way about the other WRG games I play, although those are all based on the simpler DBA mechanics.

Monday 8 October 2012

Battle of Raufheim, 1807

-->
It is 1807. Displeased by Napoleon's Continental System and the effects it has had on trade, Britain has sent an amphibious force to northern Germany to help keep the Baltic trade routes open. While ships of the Royal Navy hang at anchor, an army of 24,000 men under General Estwold has landed to march down the coast and seize the port of Rostock. Unfortunately the Dukes of Ruritania and Brunswick, motivated more by dislike of British arrogance than loyalty to Napoleon, have marched to defend the town and throw the British back into the sea.

26,000 men now stand against the British, hoping to break their assault before they reach Rostock. They meet near the village of Raufheim...

Initial set-up. Raufheim at the crossroads in the rear.

On the day of battle, the German right was held by the Duke of Brunswick's men, secreted in the Erlen Woods. The village of Erm held his vaunted horse artillery. Reist's division held the centre of the line, with Aache's division on the northern slopes. Behind Reist lay von Kleist's mounted division, today personally led by the Duke of Ruritania himself.

The British centre was held by the First Division, which counted among its ranks the 2nd Brigade of Guards. On their left was McAuliffe's Scots Division, and on their right, the Light Division, which was tasked with seizing the bridge across the Raufen. The cavalry division under Imbert held the rear, waiting for the chance of a breakthrough.

The day began with a brisk British advance. Slowed by the woods, the Light Division nonetheless made the best progress, as the main line slowed to face the Brunswickers. All along the line muskets began to fire, but the cunning concealment of the blackclad Germans kept them safe from the brunt of it. The 2nd Brigade charged Erm, and after a bitter struggle managed to rout the German artillery and spike the guns.

Realising the situation the Duke of Brunswick was about to be caught in, Reist moved his regular regiments forward, leaving his grenz and landwehr to guard the crossroads. They looked a fine sight marching forward in the morning sun, their standards snapping in the breeze. From his vantage point on the hill, Aache saw the first elements of the Light Division leaving the woods, and began edging his line forward, seeking to anchor it between Raufheim and the Raufen Copse.

Seeking a swift exit from the bottleneck presented by the River Raufen and the Erlen Woods, Estwold and McAuliffe threw their divisions into the assault.
The true battle begins.

Already shaken by the sight of bright steel approaching, the Duke of Brunswick's Brigade of Line took terrible casualties in the charge and broken, its men streaming out of Erlen Woods in a sorry mass of men thinking only of themselves, throwing away weapons in their flight. His Lights did little better against the wrath of the Highland Brigade, but retired in good order to the heart of the forest.

On the road, the slaughter was as shocking as it was great – four thousand casualties were reaped in those few brutal minutes. The 28th Infantry regiment was routed by the Guards, but the 5th British were destroyed and the 8th Brigade thrown back. McAuliffe had succeeded, but Estwold's position was precarious.

Conscious of the heroic defence already presented by his men, Reist threw forward his reserve regiments, and though the Grenz balked at his orders, they strode manfully into the fray. The regulars retired slightly to cover the 28th, and to block the Guards from consolidating their gains. The Ruritanian second line did masterfully well against the 8th Brigade, sending it packing and breaking the will of the British centre. At the same time, the mere threat of a charge by the Brunswick Hussars sent the 2nd Brigade into paroxysms of fear, leading to their annihilation under the flashing blades of German sabres.

Seeing the infantry beginning to crumble, the cavalry now leapt into action. The heavies sprang down upon the exposed Brunswick Hussars, while the Lights sped forth to assault Reist's division. Inspired, the Guards and Highlanders charged his rear line, while the 1st Brigade went deeper into Erlen Woods to seek out the Brunswick Lights, who fled under such determined pursuit.

The Brunswick Hussars fought valiantly, but were destroyed. The irregular grenz could not stand against the British charge, and the landwehr on their flank were undone as well. Even Reist's regulars evaporated before King George's elites, leaving him alone and confused with the rallied remnants of the 28th.

The British line rallies.

Seeing what had become of Reist's gallant men, Aache threw caution to the wind and sent his men charging towards the Light Division. While the regular regiments approached head on, his grenz launched a sneak attack against the British right as well. Incensed by Reist's losses and the cowardice of the Brunswickers, the Duke led his cavalry forward as well.

The cuirassiers rode to their devastation, but the dragoons of the Guard brought bitter ruin to their British counterparts, breaking their ranks and sending them fleeing in disorder to the mass of Hussars passing behind them to assault the Light Brigades. That slaughter, that fateful pause disrupted the Hussar advance enough that they broke upon the 1st Light Brigade, although the second was destroyed by the Ruritanian 2-1 Dragoons.

They say the fiercest fighting comes between countrymen, and the King's German Legion proved the truth of that as they battled the 23rd Regiment and sent them packing, both sides licking grievous wounds. The 13th were similarly handled by the 3rd Light Brigade, but the 2nd, barely over the Raufen, was destroyed by the 21st Regiment and the grenz that charged screaming from the forest of Raufen Copse.

Battered by their rough treatment, the British cavalry only moved forward slowly to cover any moves by the remnants of their Ruritanian opposites. The Scots Division moved forward to annihilate Reist's remnants, and the Light Division re-engaged Aache's men.

The battlelines have thinned.

Yet again, the redcoats carried all before them, and there, heartbroken, the Duke of Ruritania decided to withdraw in order to save what few of his countrymen he could.

Butcher's Bill
German: 18,500 casualties, 10,000 dead.
British: 12,000 casualties, 5,500 dead.

Overview
That battle could have gone either way, but the iron of the Light Division was never going to let anything hold it back. With a Morale of six and shock, there's really no reason not to charge! The fragility of cavalry formations is something I never quite remember when it comes to Napoleonic games, and that was what broke the British cavalry, compared to the larger infantry units.

It was nice to play Volley and Bayonet again after so long with the Too Fat Lardies and 40k – it's a reminder of just how large a game you can get on a 2x2 board with 2mm. I should really get the rest of my Brits and French painted up...

Man of the Match goes to the Highland Brigade for its consistent performance, but there were no real stars in this bloodbath (fun as it was).

Thursday 6 September 2012

Shadow of Gallipoli, 1969

-->
Sydney Herald, 15th August 1969

Wednesday saw Australian troops in Vietnam engaged in one of the war's bloodiest battles yet. As Neil Armstrong and his fellow astronauts were warmly welcomed home, 4 Company, 3 RAR were caught in a very different heat.
Under the command of Captain John Willicks (son of the noted war hero Colonel Archer Willicks), the company was to resupply and escort a platoon of Centurions that bureaucratic mismanagement had left stranded at the river hamlet of Phan Long. As the refuelling effort began, mortar and heavy machine gun fire hit them from both sides of the river.
HMGs in the south, mortars to the north.
A mystery ANZAC blind finds the mortars...

Working hurriedly under fire to refuel the tanks, 1 Platoon tried to prepare a defence against unknown adversaries. Several members of the platoon died in the opening salvoes. Luckily, the two observation helicopters accompanying the tanks did heroic service with their personal defence machine guns, driving the heavy mortars away into the jungle. From their aerial vantage point, they would continue to identify threats and support the men on the ground throughout the engagement.
Three Aussies die to prep the first Centurion.
A hill isn't cover when they're behind you!
Unsure of the enemy's number or location, sure only of their mission, 1 Platoon kept trying to resupply the tanks, but were ambushed by fire from the previously unoccupied village. Taking only a few casualties, their response was in the best tradition of Australian soldiery and largely neutralised the position in the first few minutes.
The village becomes a charnel house.

Responding fiercely to threats on their own position, 1 Platoon and Captain Willicks were initially unaware that a bloody firefight was taking place on the south bank. Under the command of Lieutenant McAwn and Sergeant Ryan, 2 Platoon was doing its best to suppress the heavy machine guns that threatened the ANZAC line of retreat. Unfortunately, they to be ambushed a second time by what military sources tell us was the bulk of the enemy force.
Does this troop concentration make me look fat?

Combined with the continued pressure of the heavy machine guns, a murderous storm of fire cut down several soldiers from 2 Platoon, and a sudden communist charge saw most of the unit dead or fleeing from the enemy's savagery.
Captain Qilong wins! The dice never lie...
The remnants of 2 Platoon and the HQ squad under Sergeant Ryan were then masterfully commanded by Lieutenant McAwn, who not only oversaw the safe escape of his fellow soldiers, but then neutralised and drove back the enemy advance from the paddy fields.
And it was all going so well for them...

Now resupplied fully, the Centurions began to move south, and the tattered remnants of 1 Platoon began to follow them, Lieutenant Hawkins and Captain Willicks herding their men along from the rear. As the officers devoted their attention to the infantry, the tanks began to spread out down the road,in order to claim better fields of fire.
Tanks Ho!
Some tanks are faster than others.

There was still a heavy enemy presence on the north side of the river, and though some were retreating, fresh troops were taking their place. As 1 Platoon's forward elements crossed the river, Private Laine took a critical wound requiring urgent evacuation.
Fresh 'Cong anyone?
Everyone is leaving.

Among many moments of heroism in this unfortunate affair, the last stand of Lieutenant Hawkins and Captain Willicks stands strong. Having sent their men over the river, they spied a strong force of Vietcong coming for their battered band. Taking defensive positions within the bridge's stonework, they delayed the enemy advance with nothing but their pistols, and sold their lives dearly in the inevitable charge.
They wait.
They die.

The tanks had made a significant way south, but were halted in their tracks by a new enemy ambush – Soviet anti-tank rifles immobilised one tank and damaged another before the survivors escaped. The crew of the immobilised tank also made it out alive.
Tanks shocked.

Having taken some time to appear, the medevac chopper was now needed for another four cases. Though himself wounded in the leg, Lieutenant McAwn dragged his injured squad member to the medevac before going back out into the field to secure the other casualties. Running into the paddy fields, McAwn managed to get three men who were bleeding out there into the helicopter, and sent their surviving squadmates home with them, choosing to stay in the field himself.
Greater love hath no man than this...

Even as the medical helicopter flew out, one of the observation helicopters was brought down by enemy fire, crashing into the corn fields.
Up...
...and down.

Not yet despondent – or indeed finished, Lieutenant McAwn rallied Sergeant Ryan's bloodied squad and got their casualties to the second, prompter medevac. As the squad prepared to forge south after the fleeing 1 Platoon, they were struck by mortar fire, and all six men died instantly.
Killed, so close to safety.
Moments later, the helicopter was also destroyed, by what seems to have been an anti-tank round.
OK, not so safe.

At this time, circa 1430 local time, the engagement ended. Total Australian casualties were 11 MIA, 4 critically injured, 48 other ranks KIA, Sergeant Ryan, Lieutenants Hawkins and McAwn and Captain Willicks also KIA. It is estimated that nearly seventy Vietcong were eliminated in the engagement.

Sergeant Ryan of the 3 RAR, and Sergeant Shaughnessy of the Flying Corps have both been Mentioned In Dispatches. Lieutenant McAwn has been nominated for the Victoria Cross. 

A military investigation has been launched into the circumstances of the battle, the time taken for the medevac to arrive, and the lack of artillery support available to 4 Company.


Overview
This was only our second game of Charlie Don't Surf, and boy was it bloody! The pendulum of victory swung back and forth and ended up 35:17|107:96 in favour of the Vietcong. The main problem (as ever) was shock. The Vietcong couldn't retreat due to shock, and so kept taking potshots. The Australians couldn't reach more favourable positions due to shock, and kept taking casualties. Eventually, the whole thing reached farcical proportions with the downing of two helicopters and the abandonment of a tank.

One thing not mentioned in the newspaper report is that a squad of Australian SAS were also present, trying to get secret papers back to Free World HQ. Being the good soldier that he is, Barbarossa sent straight down the line, not using them to fight at all, although their medic did stirling service with the injured men of 4 Company.

The ASAS medic was the last man left on the table. With 11 MIA, I sense rescue mission informed by said SAS soldier coming on...

Friday 24 August 2012

Ambush in Alephstan


-->
On a patrol in the Green Zone, a government patrol has been attacked by the banks of the River Jallenah. Their foes are the Islamist Ansari al-Mawt, who opened fire on the head of the platoon as they approached the bridge that once belonged to the village of Jalleni.

Opening set-up.
Contact! 2 Squad dive into the ruins.

As lead elements exchanged ineffective fire across the Jallenah, Sarjant Ghulwar led 3 Squad to the east, joining up with 2 Squad and Lieutenant al-Mularqi. Al-Mularqi gestured them on to outflank the bridge, only to rue it as the squad were forced to hit the dirt under heavy fire from the enemy.
3 Squad in pain, pinned & suppressed in the open.

Across the river, insurgents moved from the jungle to the ruins. Some of them showed their lack of faith as government fire pinned them. At the same time, Sarjant Ghulwar found it impossible to move his troops while accurate enemy fire still rained down upon them.

Seeing the distress his fellows were in, Sarjant Ulam led 1 Squad into the cornfields, and put down a great volume of fire on the Ansari who had been keeping 3 Squad trapped in the open. As the enemy fire slackened, Ghulwar finally got his men into the eastern jungle.

Encouraged by this flanking movement, 2 Squad – still hunkered down in the ruins – annihilated an enemy fire team foolish enough to move in the jungle opposite. Moving toward the river under cover of this fire, 3 Squad were struck by a torrent of fire from the ruins opposite.
Bravery is not the safest option.

Fresh insurgents arrived on the western hill and were promptly suppressed by 1 Squad. On the other flank, Ghulwar was doing sterling work directing his squad's fire at the Ansari in the ruins.

Despite their strong early position, the Ansari leaders were having little luck rallying their men, and another fire team in the central jungle went down before 2 Squad's pin-point shots.

Lieutenant al-Mularqi came forward to direct 1 & 2 Squads against the insurgents in the central jungle, and with a roar of fire they drove them back into the undergrowth.

As the enemy fire slackened from a torrent to a drizzle, Sergeant Ghulwar charged his men across the bridge ignoring the few bullets that whined from the Western hilltop – and into the ruins on the Ansari bank of the Jallenah. Already suppressed, the insurgents stood no chance, and with a flashing of bayonets, Ghulwar and his men claimed the ruins once more for Alefstan. A quick sortie into the jungle saw the butchering of the last few insurgents to the east, and just like that the battle was all but over.

More insurgents died on the hill. As they tried to retreat, the rest died too.
What is a squad leader without a squad?

With only a few enemy left, and those suppressed in their attempt to retreat, the government platoon advanced swiftly and mercilessly, wiping them off the map. There would be no rebuilding Jalleni today.
End of play.

Victory: Government Forces
Butcher's Bill: 50 insurgents KIA/captured. 6 light wounds among government forces.

Overview
This was my first game of Volume of Fire, the major modern adaptation of Crossfire. Like the official WWII version, it plays quickly and smoothly – and like the WWII version, a lack of rallying is deadly.
This was played on a 2x2 board, but with twenty terrain pieces, it didn't feel too forced. I played using my recently finished 6mm Charlie Don't Surf infantry, using the Aussies as government professionals and the 'Cong as the black-clad insurgents.
With a 50% numerical advantage, I thought the insurgents might stand a chance – they were only one rank lower than the government forces – but alas, they failed all but three Rally checks, and were sitting ducks for the G-men once they stopped hiding like frightened little bunnies. Despite a lot of suppressions on Ghulwar and 3 Squad, there were no actual losses, much to my relieved surprise.
I'll definitely be playing this again, and I'm considering starting some dedicated forces for it. Brits, US Marines and insurgents are the first ones I want... You know what they say. If Mohammed (saws) won't go the lead mountain... Oh, and maybe 6mm Crossfire too!